This tutorial teaches you to integrate Sendbird UIKit for Flutter in your mobile application to implement chat functionality.
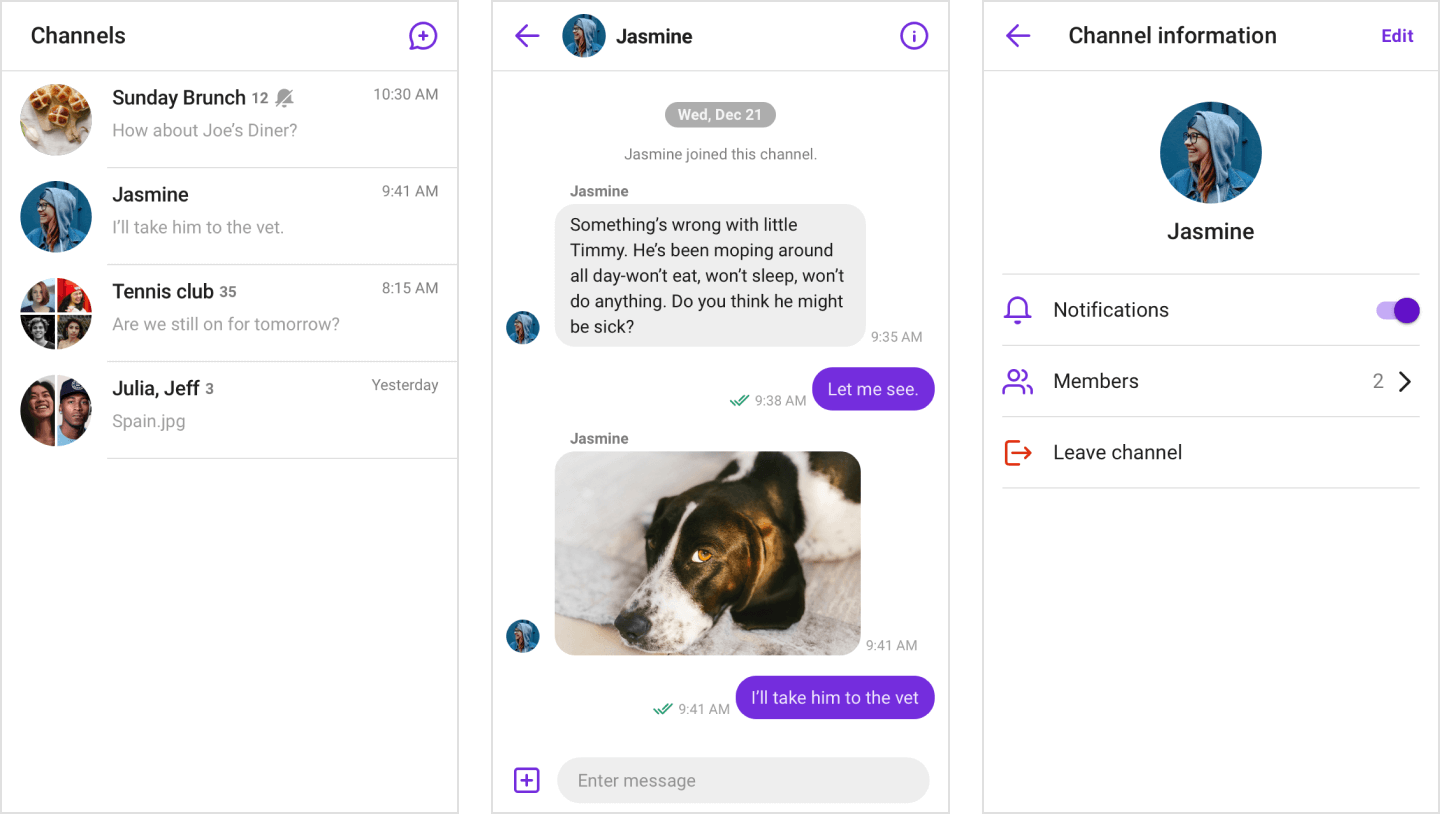
This is what your app will look like when you've finished this tutorial:

What you'll learn
- How to create a new Flutter project
- How to install UIKit
- How to initialize UIKit
- How to implement chat screens
- How to send your first message
What you'll need
- Dart 3.3.0 or later
- Flutter 3.19.0 or later
- A code editor (VS Code, Android Studio, etc.)
Note: (For iOS) To support Apple privacy manifest, make sure to add the contents of ios/Resources/PrivacyInfo.xcprivacy to your project's PrivacyInfo.xcprivacy file.
Before you start, you need the following:
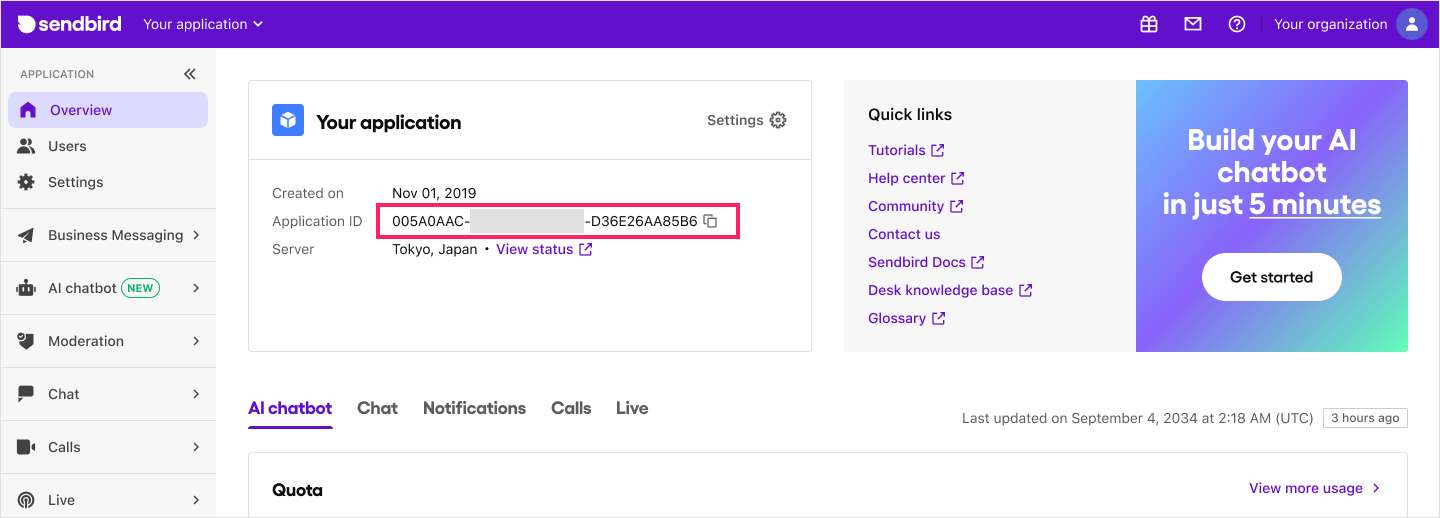
Application ID
- Go to Sendbird Dashboard and create an account or sign in.
- Click Create + to create a new application.
- Enter a name, choose a Product Type and Region, then click Confirm.
- Note down the Application ID - you'll need this later.

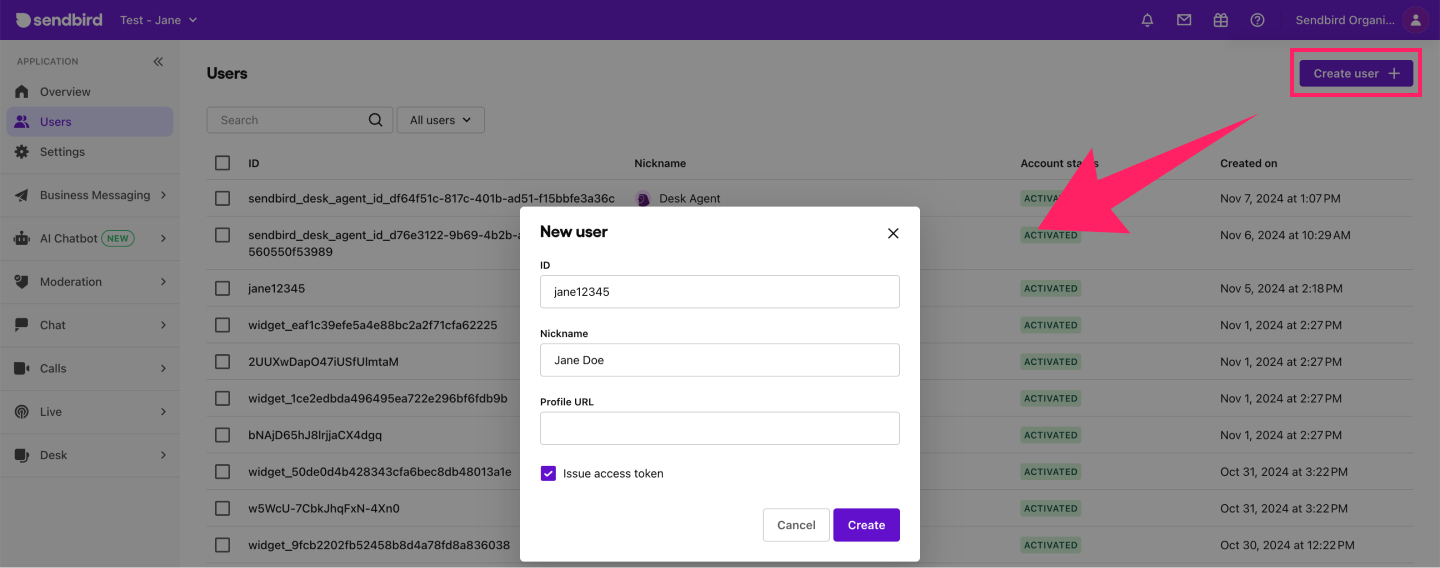
User ID
Next, create a user in your Sendbird application:
- Go to the Users menu and click Create user+.
- Enter a User ID and Nickname. Check Issue access token for authentication.
- Click Create and copy the user ID for later use.

Let's start by creating a new Flutter project:
flutter create chat_app
cd chat_app
Add the following dependencies to your pubspec.yaml file:
# Indentation matters! Use spaces, not tabs.
dependencies:
  flutter:           # 2 spaces
    sdk: flutter     # 4 spaces
  sendbird_uikit: ^1.0.0     # 2 spaces
  sendbird_chat_sdk: ^4.2.30 # 2 spaces

flutter:
  fonts:
    - family: SendbirdIcons
      fonts:
        - asset: packages/sendbird_uikit/fonts/SendbirdIcons.ttf
Once you've added the dependencies, run the following command:
flutter pub get
Now let's initialize the Sendbird UIKit in your application.
Create main.dart
Replace the contents of your lib/main.dart file with:
import 'package:flutter/material.dart';
import 'package:sendbird_uikit/sendbird_uikit.dart';

void main() async {
  WidgetsFlutterBinding.ensureInitialized();

  await SendbirdUIKit.init(appId: 'YOUR_APP_ID');
  await SendbirdUIKit.connect('YOUR_USER_ID', accessToken: 'ACCESS_TOKEN');

  runApp(const MyApp());
}
Replace these values:
YOUR_APP_ID: Your Sendbird Application IDUSER_ID: The user ID you created earlierACCESS_TOKEN: The user's access token
Note: You can find the user's Access token in the Sendbird Dashboard under your Application > Users > your user > Access token. For this tutorial, you are using the user access token as a way of authentication. For actual implementation, itt is highly recommended to refer to this authentication guide to implement a more secure way of authentication.
Let's implement the main chat screens in your application. Add this code to your main.dart.
This implements:
- Group Channel List Screen
- Channel Creation Screen
- Channel Chat Screen
- Navigation between screens
class MyApp extends StatelessWidget {
  const MyApp({super.key});

  @override
  Widget build(BuildContext context) {
    return MaterialApp(
      debugShowCheckedModeBanner: false,
      builder: (context, child) {
        return SendbirdUIKit.provider(
          child: Navigator(
            onGenerateRoute: (settings) => MaterialPageRoute(
              builder: (context) => child!,
            ),
          ),
        );
      },
      home: HomeScreen(), // Separate screen widget
    );
  }
}

class HomeScreen extends StatelessWidget {
  const HomeScreen({super.key});

  @override
  Widget build(BuildContext context) {
    return Scaffold(
      body: SafeArea(
        child: SBUGroupChannelListScreen(
          onCreateButtonClicked: () {
            moveToGroupChannelCreateScreen(context);
          },
          onListItemClicked: (channel) {
            moveToGroupChannelScreen(context, channel.channelUrl);
          },
        ),
      ),
    );
  }

  void moveToGroupChannelCreateScreen(BuildContext context) {
    Navigator.push(
      context,
      MaterialPageRoute(
        builder: (context) => Scaffold(
          body: SafeArea(
            child: SBUGroupChannelCreateScreen(
              onChannelCreated: (channel) {
                moveToGroupChannelScreen(context, channel.channelUrl);
              },
            ),
          ),
        ),
      ),
    );
  }

  void moveToGroupChannelScreen(BuildContext context, String channelUrl) {
    Navigator.push(
      context,
      MaterialPageRoute(
        builder: (context) => Scaffold(
          body: SafeArea(
            child: SBUGroupChannelScreen(
              channelUrl: channelUrl,
            ),
          ),
        ),
      ),
    );
  }
}
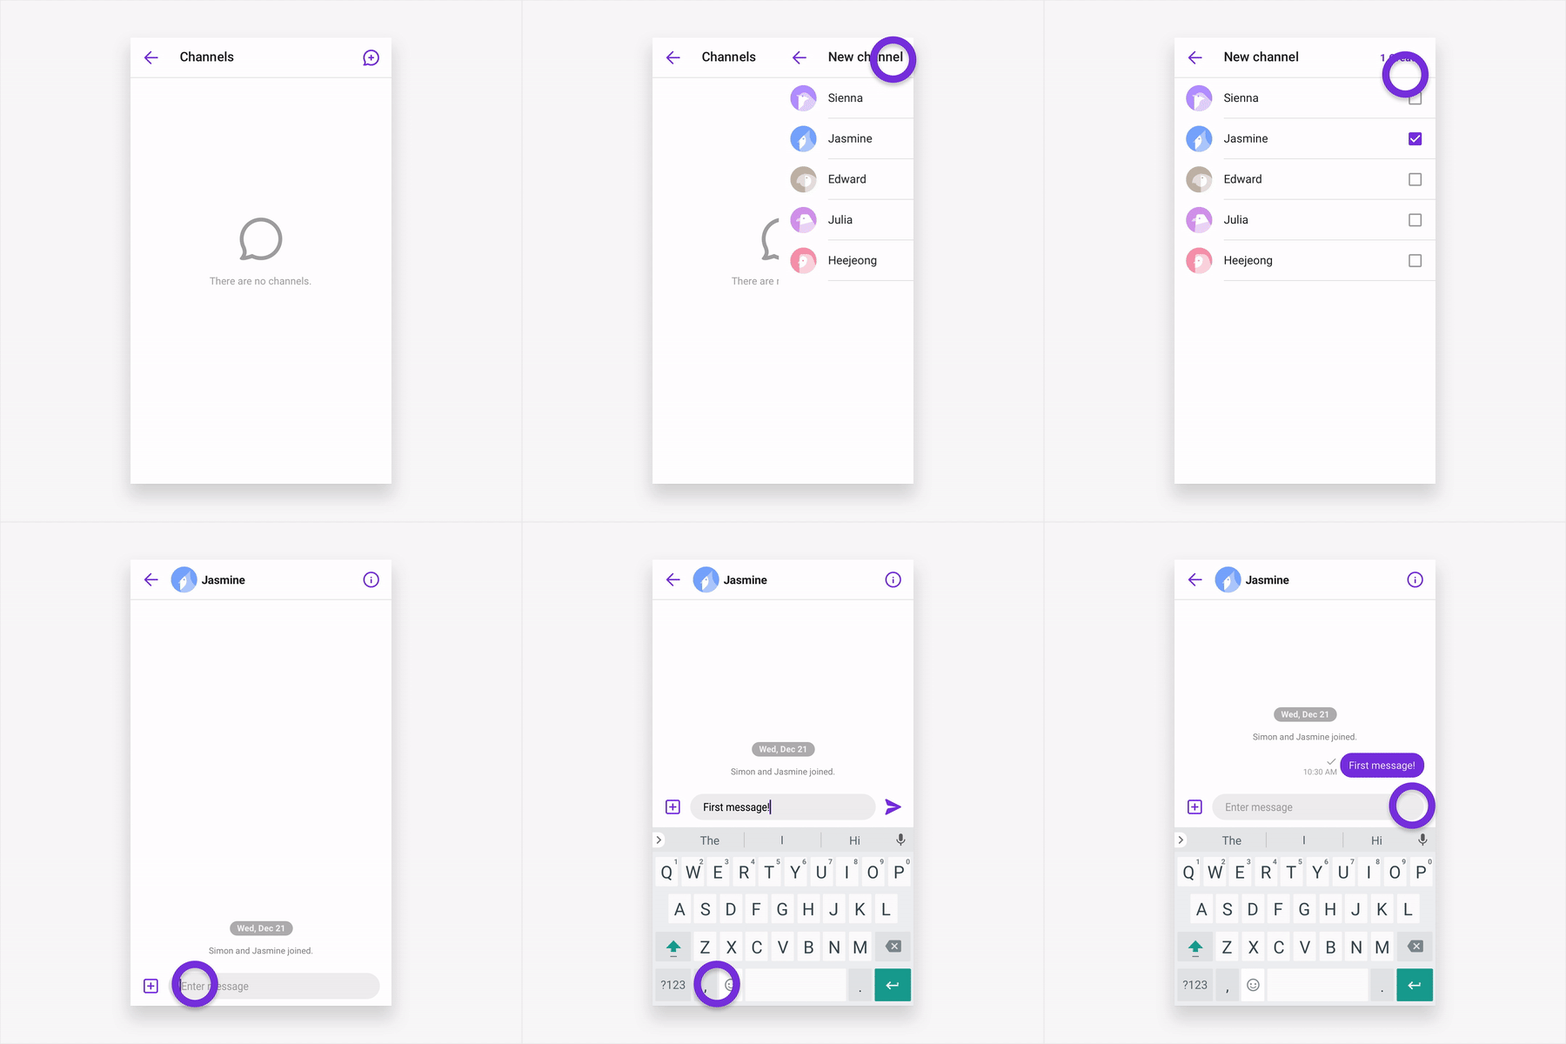
Now let's test your chat implementation:
- Run your app:
flutter run - Create a new channel:
- Tap the create button in the top-right corner
- Select users to add to the channel
- Confirm channel creation
- Send a message:
- Type your message in the input field
- Tap the send button

You've successfully:
- Set up a Flutter project with Sendbird UIKit
- Implemented a complete chat interface
- Created your first channel
- Sent your first message
- Explore the list of UIKit screens
- Check out the sample app
- See Sendbird UIKit for Flutter documentation